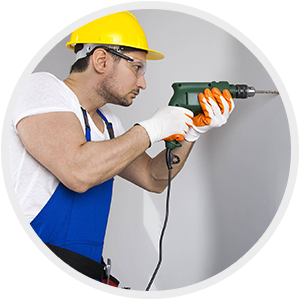
When you decide to embark on a new home improvement project or have checked on diy subscriptions, there are important things to consider. Whether you’re doing an in-depth remodel or are just looking to hang up some new home decor, you’ll need to have a few tools on hand.
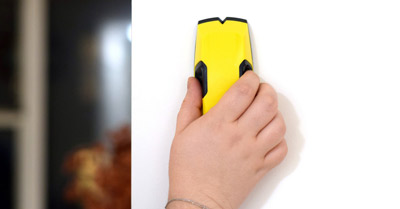
A common tool that is both versatile and easy to use is the stud finder. It can come in a variety of types, from simple to high-tech, depending on your preferences.
But what makes this handheld tool so valuable? And what should you be looking for when you’re looking to pick one up from the hardware store? To help you move forward in your next project, here we share what exactly a stud finder is, how it works and other important things to keep in mind as you excel in your next home project.
What is a Stud Finder?
In order to understand what makes a stud finder, you should know what a stud is. Let’s break it down.
In your house, you have your wall, which is most likely sheets of drywall. However, behind the drywall are the studs. The studs are the structure that your drywall is attached to. A stud measures by lengths of 2 feet by 4 feet. These studs basically provide a frame that the drywall is screwed into before it is taped and mudded to create a seamless finish. The studs are aligned vertically to run from the floor to the ceiling.
Keep in mind that you will place your drywall overtop of those studs. And once the wall is finished, you won’t be able to see where the studs that are holding up the wall are located. A stud finder is helpful in being able to find the position of where the studs are aligned.
Why is it Important to Find Studs in Walls?

Studs are hidden by the drywall so you won’t be able to see where they are. So what does that mean in starting a home project or just doing something new around the house?
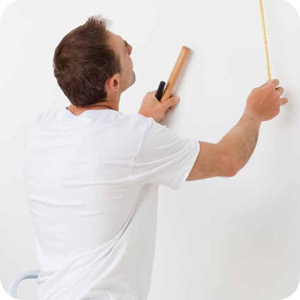
Perhaps you want to hang something on your wall.
For light items, say a sheet of paper or pieces from editors magazine subscriptions – you can use tape, tack or even put a small nail in the wall. But when it comes to hanging heavier items, you’ll need to be a little more attentive to where and how you hang things.
If you try to hang something like a mirror and put a nail anywhere, it is going to be unstable because there is only a thin layer of drywall holding the nail. The drywall can’t hold it as it is a very brittle material. To help the nail stay in its place and have the capacity to hold whatever it is you are trying to hang, a stud comes in handy.
If you can hammer the nail through to the wooden stud behind, it is going to create a solid fastener that can hold a lot of weight. This also goes for screws and any other fastener that you can drive into a wall.
By finding a stud, you can hold heavy items that weigh up to hundreds of pounds if necessary. However, without a stud, the thin, brittle drywall might only be strong enough to hold an item that is just a pound or two in weight.
Knowing where your studs are in the wall also helps you be confident that you know where the nails are going in. For example, you will not want to put a nail through the center of a double stud. With a stud finder, you can know exactly how the studs are aligned and preserve the framing of the wall. Checking the edges of where the studs are aligned can also help you to recognize any double or triple studs used in the wall. These seemingly small details can make a big difference as you take on a new home project.
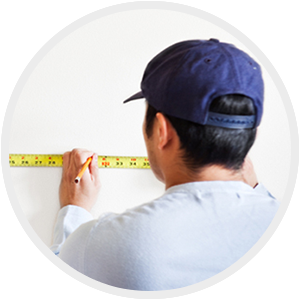
A stud finder will also help you to know how far apart the studs in the wall are. You can know whether they are spaced either 16 or 24 inches apart. This can he helpful information to know as you’re looking to hang heavier items safely. It will also prevent you from ruining the drywall by hanging something that might be too heavy than what the wall itself can hold.
How Does a Stud Finder Work?
As such an important and versatile tool, the stud finder can come in a wide range of extra features and capabilities, depending on your preferences and requirements.
If you want to go old-school, you can use a magnet. Some models of stud finders even indicate the use of magnet technology to make the stud finder work. If you place a magnet against your wall and move it around, you should be able to sense when it passes over a nail or a screw if the magnet is powerful enough. Being able to sense where the nail or screw is can help you tell where the drywall is attached to the stud and where the stud is. These work better most often with walls that are lath or plaster rather than drywall. These models tend to be fairly inexpensive, and for good reason.
The problem with this method is that it is slow and is not always reliable.
Other stud finders incorporate additional technology capabilities to make finding the studs much more reliable and effective. Modern stud finders use changes in capacitance to indicate the location of studs. The stud finder will sense the change in dielectric constant when the stud finder moves from drywall to drywall with a stud behind it. The sensor and circuity will record this change and display the information for you. These electric stud finders are clearly the more precise and easier to use models. Instead of basing your determination only on sensing gentle pulls from a magnet, this electric version will indicate where the stud is with sound and light.
Modern stud finders are extremely accurate, easy to use, and quick.
How to Use a Stud Finder

Whether you’re new to home projects or have been doing them for years, stud finders are very easy tools to use, no matter your experience level.
- The first thing to do is to check the type of stud finder that you bought. We recommend stud finders that work with density rather than the magnetic type. This provides a much more accurate reading and helps this step in the home project easier and stress-free.
- The problem with the magnetic type is that they will find the screws and nails but will not give you the exact location of the stud. The nails could be centered or could be off to the side. Density stud finders will give the exact location of the studs. The magnetic stud finder can also confuse you between a stud and another object, such as pipes. These things, whether pipes, wires or ducts need to be avoided when hoisting up fasteners. Neglecting to find out where these essential components are might lead to some devastating effects for your wall and room.
This short instructional guide will deal with density stud finders but works equally well for magnetic stud finders too. Before we get into that, though, read through the instruction manual that came with your stud finder.
Step 1
Decide where you want to hang your item and remove anything from the area that could affect the reading, such as pipes especially if you are using a magnetic stud finder.
Step 2
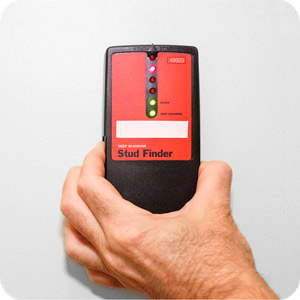
Make sure that your stud finder has power and is switched on. Check to see which side you are going to be placing against the wall, usually the side with soft contacts to protect the wall from scratches.
Step 3

Studs are generally spaced 16 or 24 inches apart, so be prepared to check 12 inches of wall in either direction to ensure that you find the stud. Hold the stud finder against the wall and press the button to calibrate the stud finder (you will find information about how to do this in your instruction manual.
Step 4
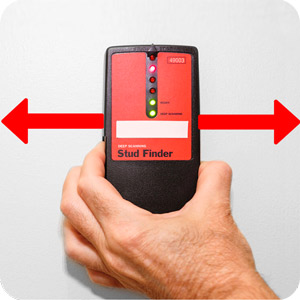
Move the stud finder in a horizontal motion, left and right, keeping the stud finder pressed against the wall.
Step 5
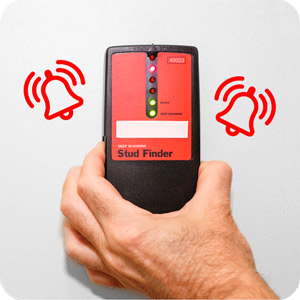
The stud finder in deep scan mode will alert you when a stud is found via a beeping noise or a flashing light, or maybe both. Move the stud finder slowly to pinpoint the exact place where the stud is located.
Step 6
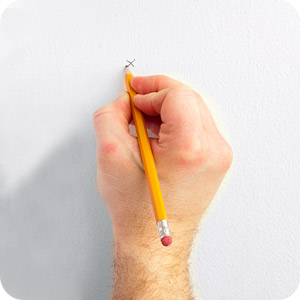
Use a pencil to mark where the stud is. A density stud finder will show you where each edge of the stud is. It’s important that you mark each edge so that you can drill or hammer in the exact center of the stud. The center of the stud provides you the most stability. Instead of using a pencil, you can also use painters tape to mark off where you’ve found the stud sides to be.
Step 7
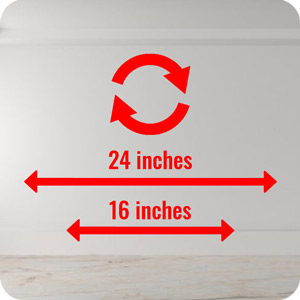
To ensure accuracy, repeat the process again to check for the location of the stud and check that were are studs on either side of the one that you marked, at a distance of either 16 or 24 inches.
Step 8

Get ready to hang your wall art or move forward in another project. Congratulate yourself on a job well done.
Other Popular Articles on ComproGear
We recently covered the new TikTok rose toy this here trend that’s sweeping the nation.
Air quality is important, we choose a car air purifier recommended for it’s quiet operation.
Bachelorette party penis straws a great wedding shower gift if you can get fast shipping.
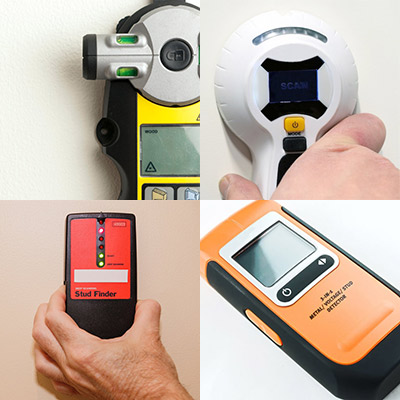
Types of Stud Finders
While density and magnetic stud finders are the most common models that you can find in almost any hardware store, in addition to online. However, there is also a range of other stud finders. Some of these other modles use those methods and some that do not. Let’s take a look at some of the different stud finders that you can explore for yourself.
Electronic Stud Finder
The electronic stud finder is the most common type of stud finder available on amazon. They are accurate, have simple displays and are easy to use. This hand tool is also very easy to use and can comfortably fit in your hand as you work. The only downside for this model is the reliance on batteries in order to use the device. You may also be able to find a retailer on amazon with a version that uses a charger to give it power.
Magnetic Stud Finder
Another common type of stud detector, the magnetic stud finder has the ability to locate those nails and screws that are near the stud. They are affordable and easy to use, but you are locating the nails, screws and pipes and not the actual stud. This can lead to more inaccurate results and more frustration.
Whole Stud Detector
Instead of finding the near sides of the stud one at a time, this type of stud finder will locate the entire stud in one go. It can make finding the exact position of the stud much quicker and easier.
Electronic Center Finder
These type of operation in stud finders will locate the center of the stud for you without you having to work that out based on the edges. As the center of the stud is the most important part to find, this model can be very helpful in moving through a project quickly and efficiently.
Instant Stud Finder
Wider than other stud finders, you place this device against the wall, and it will locate the stud, and anything else, without you having to move it around. It can be a great option for people who like to work simultaneously or have to find a lot of studs in the wall in a short amount of time.
Best Stud Finder
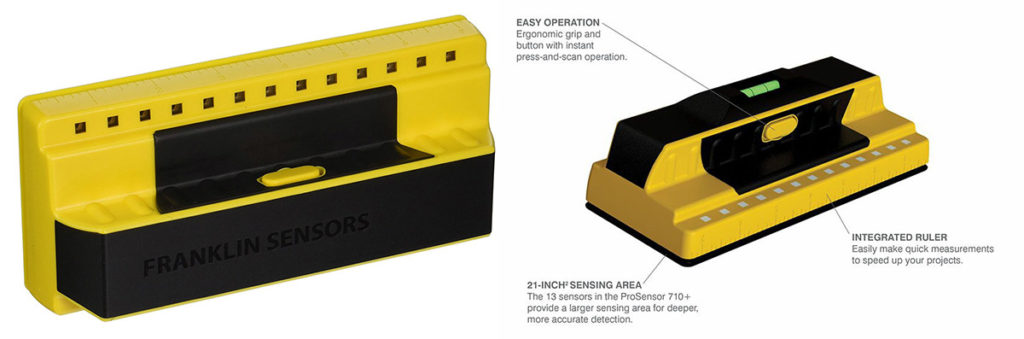
Franklin ProSensor 710 Stud Finder
www.amazon.ca/ProSensor-710-Franklin-Sensors-Precision/dp/B0064EICKG/
With multi-sense technology, this franklin sensors prosensor available on amazon – is a detector that can find multiple parts of your wall with accuracy to let you know where the stud is in precision without you having to move it around. Once it is placed on the wall, an LED will light up to show where the stud is located.
The sensor will scan deep and simultaneously alert you to other hidden objects located in your wall, giving you the width and position so that you know where not to drill.
An accurate device with precision that will help to find all your studs.
Runner Up
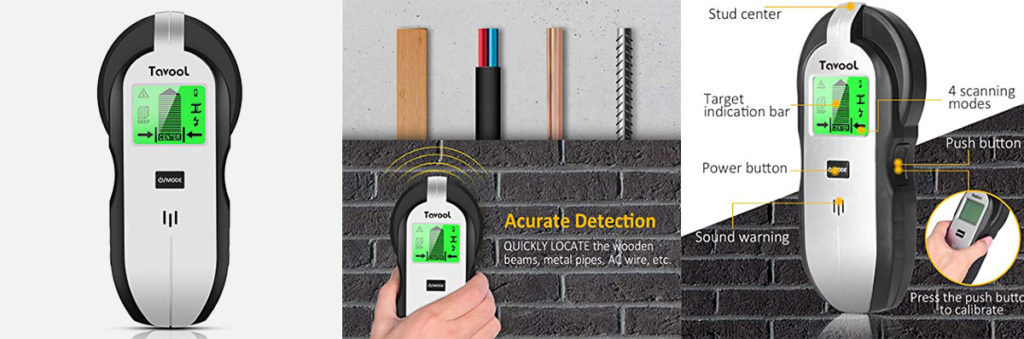
Tavool 4-in-1 Stud Finder
www.amazon.ca/Stud-Finder-Electronic-Detector-Scanner/dp/B07F6RZM43
With a simple and intuitive design and clear display, this stud finder can scan for wood, metal studs, wires, and other embedded objects. It can also detect copper, aluminum, rebar, and more, making it a safe choice if you are unsure what is behind your wall.
In deep scan mode, the LED screen gives you precision with all the information that you need, similar to telling you where the center of the stud is, and including the automatic calibration that saves you valuable time.
Suitable for most diy projects, this is easy to use and handy for more than just studs.
Stud Finders App – Does it Work?
Did you know that your phone may be the key to finding studs in the wall? There are many apps out there that claim to be able to locate studs with your phone and, the truth is, they actually do work.
Having said that, these design and operation only work on newer phones. You will also need to have the latest software on your phone for best results. Keep in mind that while they are very convenient, they are not near in terms of accuracy as a stud detector like the electronic options. Remember the possibility that you can miss the stud and you might find yourself drilling into fresh air. They can work in a pinch, but you should not rely on them, especially for large-scale projects that require exact positioning and alignment with the studs.
How to Find a Stud Without Stud Finders
There are three main approaches to finding a stud without a detector.
The Educated Guess
Studs are most commonly placed 16” apart. With this knowledge, we may measure from the end of a wall and hope that you hit a stud. You can also measure from where you know there is a stud or, you can use windows, outlets, and switches as a guide. These will almost always be attached to a stud, at least on one side. Find an outlet, and pick a side. If you find a stud, you can use it or measure from it.
The Magnet Detector
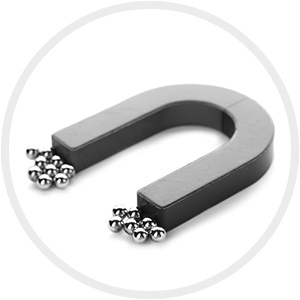
If you have a magnet, run it over the spot or wall and hope that it picks up on some metal studs. In terms of precision, this may not work if the magnet is not powerful enough, so go big or go home.
The Hit & Hope
Pick a spot on the wall, and drill into it. If you don’t hit a stud, move an inch horizontally and try again. We don’t recommend this method as you might drill into something that you shouldn’t, and it is going to leave your wall with lots of holes.
How to Mark the Studs on the Wall When You Find Them
Not much to say here. Use a pencil so that you can remove it later, mark each side of the stud, mark the middle of the stud, drill your hole, and then erase the pencil marks.
Tips and Tricks of Finding Studs
You’ve made it this far, so you are invested in finding a stud. Here are some tips and tricks to make stud finding easy.
- Have the right tools. If that diy design operation requires finding a stud in your preferred spot, we may buy a stud detector.
- Choose the right stud finder. Check out the many stud information we have provided above and choose the right stud finder for your needs.
- Double-check. Once you have located a stud, repeat the process to confirm its accuracy and that the stud detector did not malfunction.
- Have power. Charge your battery before use, including making sure that the stud finder has enough power before starting. Low power can affect the readings.
- Be patient. Once you drill, the hole is there, so take your time and do it right.